Morning coffee, a beloved beverage for centuries, has undergone numerous transformations. Home smoked coffee beans is one method that’s gaining popularity among coffee and food smoking enthusiasts. Yes, you read that right! Smoked coffee beans are an innovative twist on the traditional roast that adds depth and complexity to your cup of joe. But what exactly are smoked coffee beans? How do they differ from regular roasted coffee? And most importantly, how do they taste? Let’s dive in and explore the world of smoked coffee together.
What You Need For Smoked Coffee Beans
I’m going to walk to through the different ways to smoke coffee beans. You will need the following items to get started:
- Smoke tube
- Smoking Pellets
- Foil pans
- Cast Iron skillet
The first three of these items will be needed for all three smoking methods, only the cast iron skillet will be needed for the last method, when smoking green coffee beans.
We are essentially going to cold smoke coffee beans, except it does not need to be cold, we are just not using any heat. I used a cherry and pecan pellet mix for this recipe. If you are looking a great variety of pellets, try the Cameron’s Pellet variety pack, perfect for someone that does need a ton of pellets. For a smoking tube, I have been very happy with this smoking tube from Amazon, budget friendly and solid quality.
Smoking Coffee Ground and Roasted Coffee Beans
The process for these two is pretty much about the same, with the exception of timing. Smoking coffee grounds is a little bit faster but that is the only difference. Let’s get started!
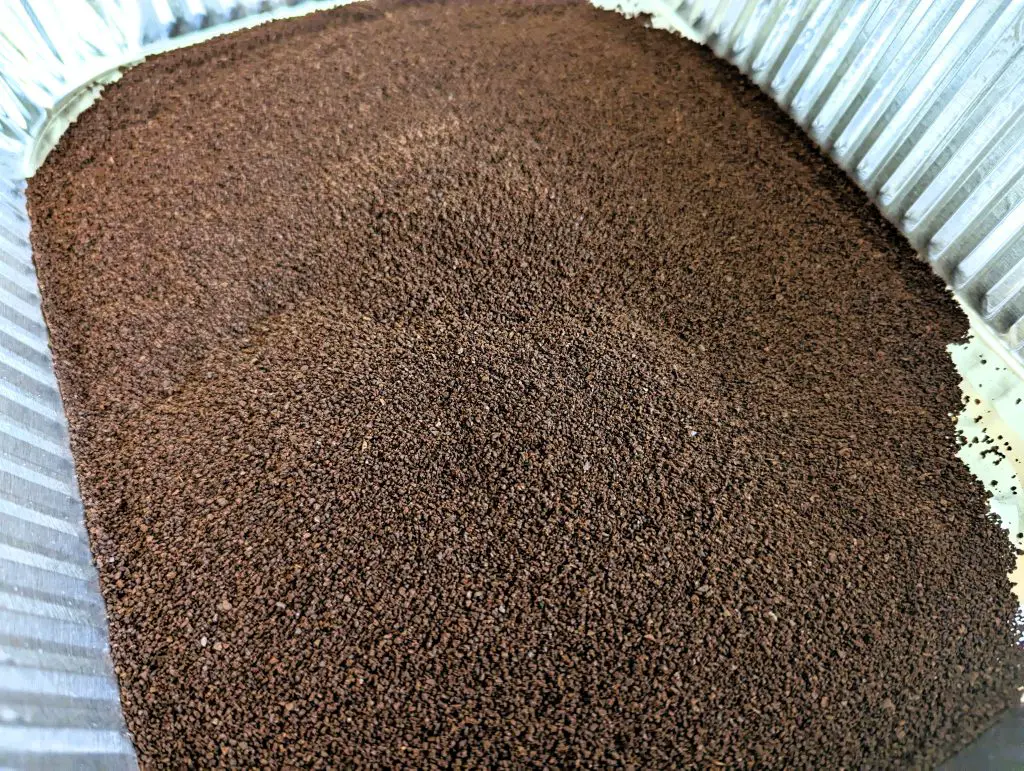
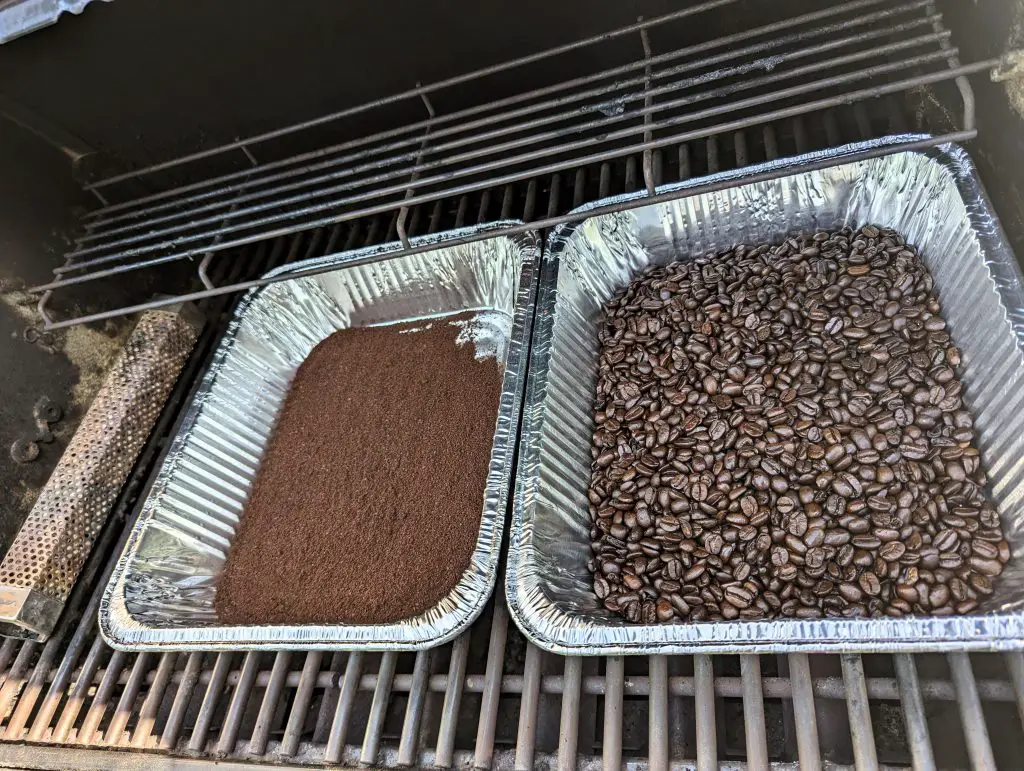
For both, you will use foil pans and place the coffee in the pans, ground coffee in one and whole beans, in the other. In my case, I will usually cold smoke items in my grill. Its an easier layout and allows me to usually fit the pans easily. Use whatever it is you use, whether a grill like myself or your smoker or Kettle. After you have your beans and grinds in the pans fire up the smoking tube.
Best way to start a smoking tube it so fill it with the pellets, stand it upright and light it. Allow it to smolder upright for about 5-10 minutes, then flip it down on its side, it should start to smoke from there on out.
After you feel good about the tube smoking, close the grill or smoker and let it smoke. A full tube, should get you about 4 hours of smoke time. Depending on how much big your pans are and how much coffee you put in them, you will want to stir/shift the ground and pellets to ensure they all get some smoke. My recommendation is every 30 minutes, give everything a stir.
After about 2 hours, your coffee grounds should be ready. You can remove them and put them aside. We are going to want to put them in an airtight container or bag and seal for about three days. This will give the smoke flavor some time to mellow out and blend with the coffee. After about three days the coffee grounds will be ready to serve and enjoy!
Your roasted coffee beans we are going to leave in there for some more smoke exposure time. A full four hours or the entire smoke tube will do it. After you pull the grounds keep shifting the beans around every 30 minutes. Once you hit that four hour mark, pull those beans. We are going to do the same thing, seal them up, give them about 3 days for the smoky flavor to mellow out and blend in with the coffee. After 3 days, you can grind them up and serve them as you normally would.
Smoking Raw Coffee Beans
Ok, so that first portion answered your questions, ” can you smoke coffee “, the answer clearly yes. Now we are going to move to the next way of smoking coffee and smoking raw coffee beans. You may see them referenced as green coffee beans or unroasted coffee beans as well. When I was doing this, I called around to several local coffee roastery’s and asked if they sold green coffee beans and unfortunately none did. You can try where you live and see if they do but seems unlikely. I probably called 4-5 local places.
So needless to say, Amazon was my next stop. I used Ethiopian Yirgacheffe coffee beans. I like supporting local businesses but this was a tough one, so go local if you can, otherwise this was a good coffee bean to use, I have no regrets.
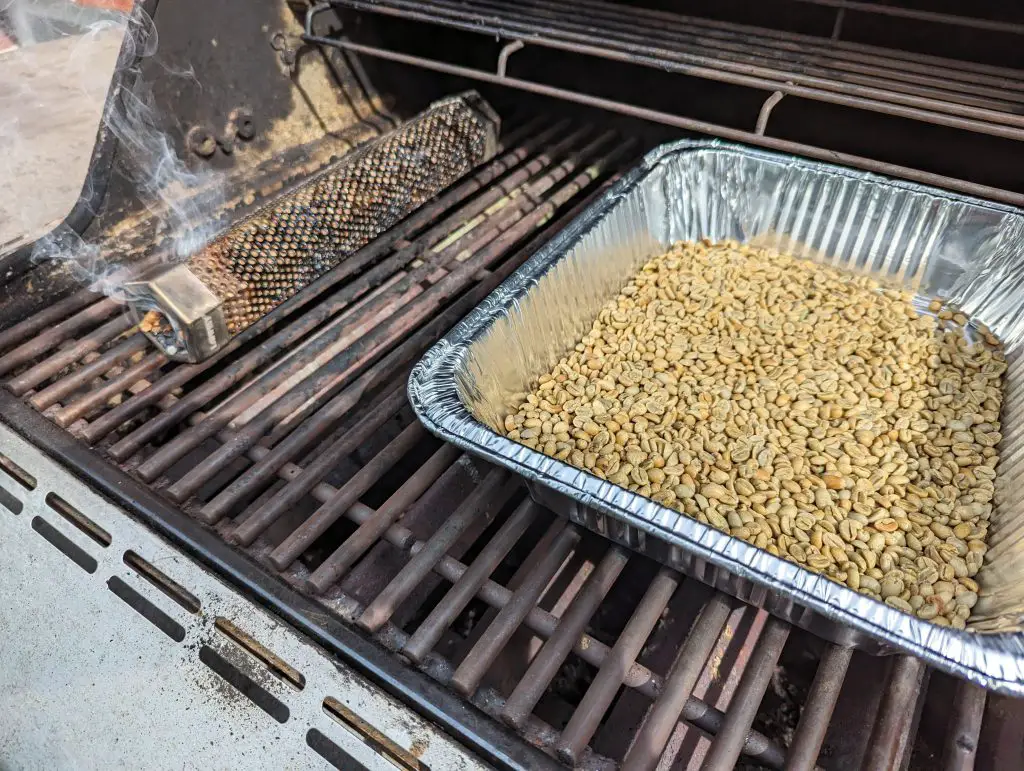
So this will start out the same as above, coffee beans in a foil pan, smoker tube up and running. Again, I went with a cherry and pecan pellet mix. We are going to let this go for the full tube, four hours worth of smoking and again, stirring every 30 minutes to make sure all the beans get exposed to smoke. After four hours of smoking, you can remove the beans and we will start to prepare for roasting the beans.
How To Roast Coffee Beans In A Cast Iron Skillet
Roasting your own coffee beans in a cast iron skillet can be a fun and rewarding experience. Not only will you get to enjoy the aroma of freshly roasted coffee, but you’ll also have complete control over the roast level and flavor profile of your beans.
Here is the roasting process, step by step for green coffee beans in a cast iron skillet:
- Preheat your skillet: Place your cast iron skillet on medium-high heat for about five minutes until it gets hot enough to start roasting.
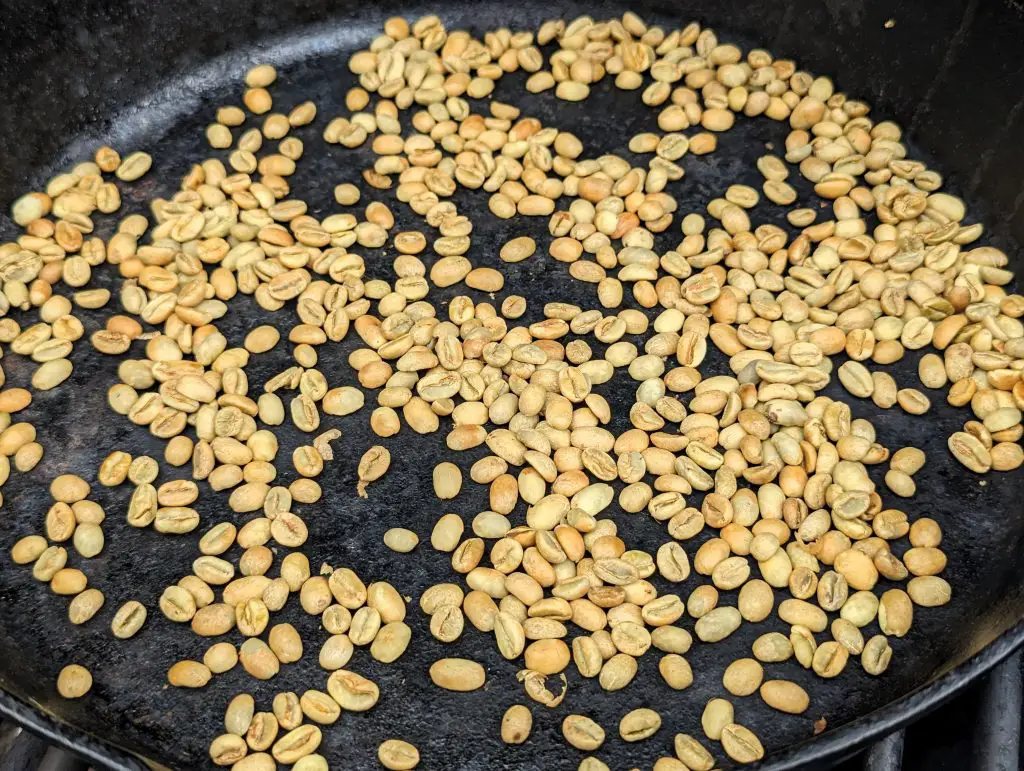
- Add your beans: Once the skillet is hot, add one cup of green coffee beans into the pan. Make sure the layer of beans is thin and spread out evenly across the surface area. You do not want the beans layered at all, as it will create uneven roasting.
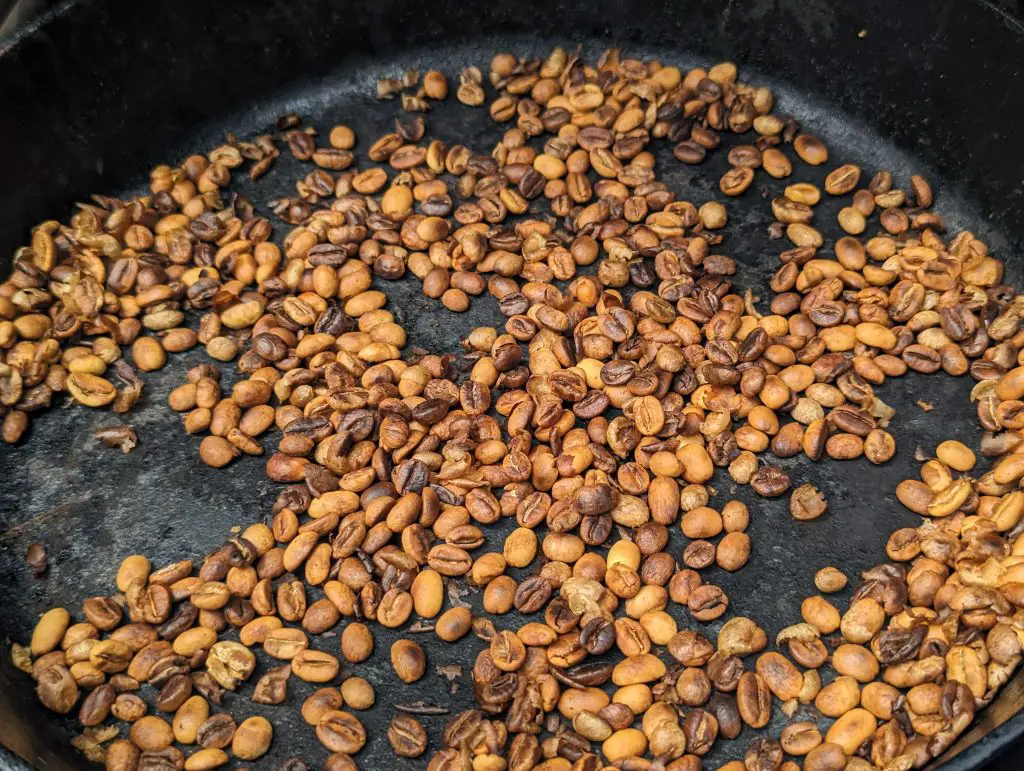
- Stir continuously: Using a wooden spoon or spatula, stir the beans constantly to ensure they roast evenly and don’t burn. As they begin to heat up, they’ll change color from green to yellow before turning brown.
- Listen for cracks: After several minutes of stirring, you should hear the first crack – this is when moisture inside the bean escapes through small cracks on its surface creating an audible popping sound like popcorn popping. This stage indicates that your bean has reached light roast level.
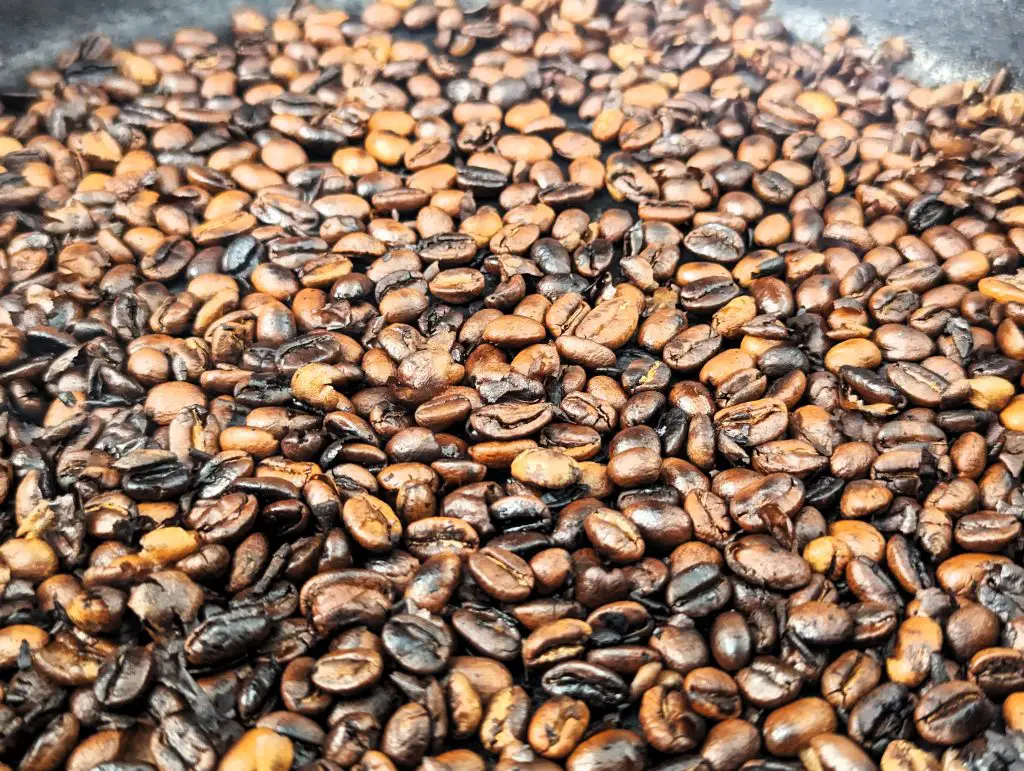
- Watch for second crack: Continue stirring until you hear a second crack which sounds more intense than first crack indicating that oil has started coming out from inside (which can make them taste burnt). At this point, unless you want dark roasted coffees you can consider removing them.
- Repeat until you have roasted all the beans. Each batch should take about 8-10 minutes.
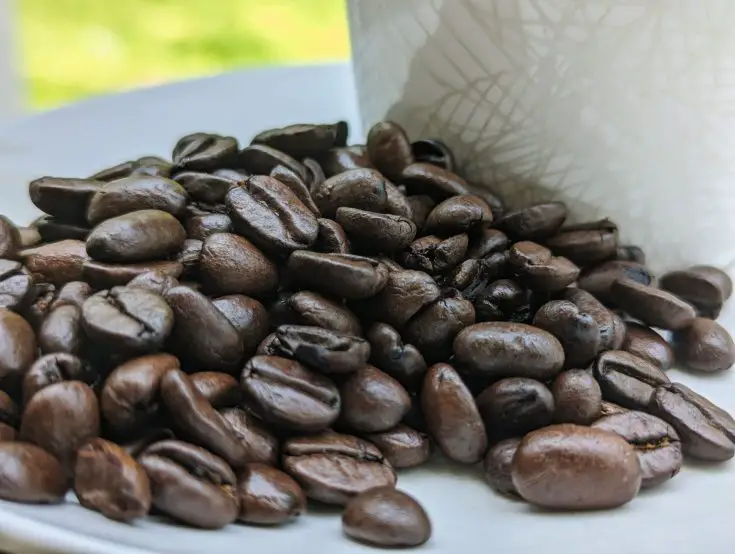
After you have completed the roasting process, in a similar manner, you are going to seal the beans and give them three days to mellow and then you can grind the beans and enjoy!
Wrapping Up Smoked Coffee Beans
Smoked coffee beans are a unique and flavorful addition to the world of coffee. They offer a distinct smokiness that can enhance the overall taste profile of any cup of coffee. Whether you prefer light or dark roasts, there is a smoked coffee bean out there for everyone to enjoy. If you’re looking to switch up your morning routine or impress guests with an exciting new brew, consider trying smoked coffee beans. With their bold flavor and aroma, they are sure to leave a lasting impression on even the most seasoned coffee drinkers.
Thanks for being here and checking out this Smoked Coffee Beans recipe. I hope you enjoy it! We always appreciate comments, 5 star recipe rating and social media shares. As always, keep that smoke rolling!
Need some other recipes to try? Here are some suggestions:
- Cold Smoked Cheese
- Smoked Cream Cheese
- How To Make Smoked Ice
- Hickory Smoked Almonds
- Smoked Pork Nachos
- Old Bay Potato Wedges
This post contains affiliate links. If you use these links to buy something I may earn a commission.
Smoked Coffee Beans
An amazing and flavorful way to change up your morning coffee routine.
Materials
- Smoke tube
- Smoking Pellets
- Foil pans
- Cast Iron skillet
- Coffee grinds, whole beans and unroasted coffee beans
Instructions
- Place your coffee in foil pans and place on grill or smoker
- Start your tube using a mix of cherry and pecan wood
- Smoke the coffee grinds for 2 hours, stirring every 30 minutes
- Smoke the whole beans for 4 hours, stirring every 30 minutes
- Smoked the unroasted bean for 4 hours, stirring every 30 minutes
- Coffee grounds and roasted beans, remove and place in a sealed container for 3 days, then serve
- Unroasted remove after 4 hours and follow roasting directions below:
For unroasted beans:
- Preheat your skillet: Place your cast iron skillet on medium-high heat for about five minutes until it gets hot enough to start roasting.
- Add your beans: Once the skillet is hot, add one cup of green coffee beans into the pan. Make sure the layer of beans is thin and spread out evenly across the surface area. You do not want the beans layered at all, as it will create uneven roasting.
- Stir continuously: Using a wooden spoon or spatula, stir the beans constantly to ensure they roast evenly and don’t burn. As they begin to heat up, they’ll change color from green to yellow before turning brown.
- Listen for cracks: After several minutes of stirring, you should hear the first crack – this is when moisture inside the bean escapes through small cracks on its surface creating an audible popping sound like popcorn popping. This stage indicates that your bean has reached light roast level.
- Watch for second crack: Continue stirring until you hear a second crack which sounds more intense than first crack indicating that oil has started coming out from inside (which can make them taste burnt). At this point, unless you want dark roasted coffees you can consider removing them.
- Repeat until you have roasted all the beans. Each batch should take about 8-10 minutes.
- Seal in an airtight container for 3 days, then grind and serve.